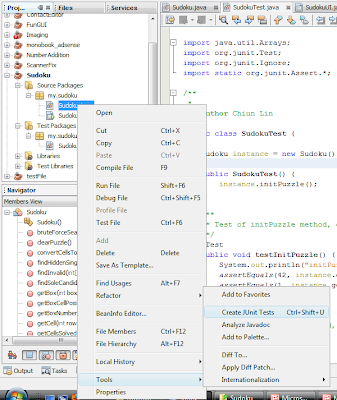
1. Right click on the file that you wish to test -> Tools -> Create JUnit Tests (shortcut key: Ctrl + shift +U)
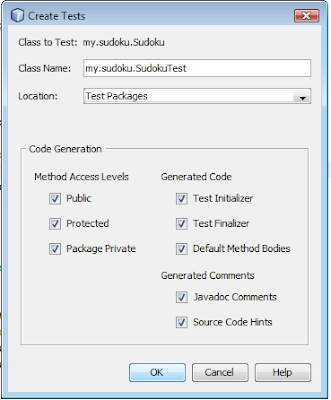
 2. Click ok. The class name needs to be appended with "Test". Other than that, it's ok to change the class name though it's recommended to stick to the default. As for the checkboxes, you can leave them as they are. You can modify them those things in the test file later anyway.
3. Modify the class however you want it. I recommend reading the following JUnit tutorial. You may refer to my SudokuTest.java to see how I implemented it.
4. Once you're done, right click on the test file -> Test File (shortcut key: Ctrl + F6) or right click on the file that you're testing -> Test File. The difference between the two methods is that the latter will run all test files associated with the file being tested.